 ← Back
TL;DR: Installwireguard, enable forwarding, create one server keypair and one keypair per client, configurewg0, add narrowly scoped NAT rules, allow UDP 51820, and enablewg-quick@wg0at boot.
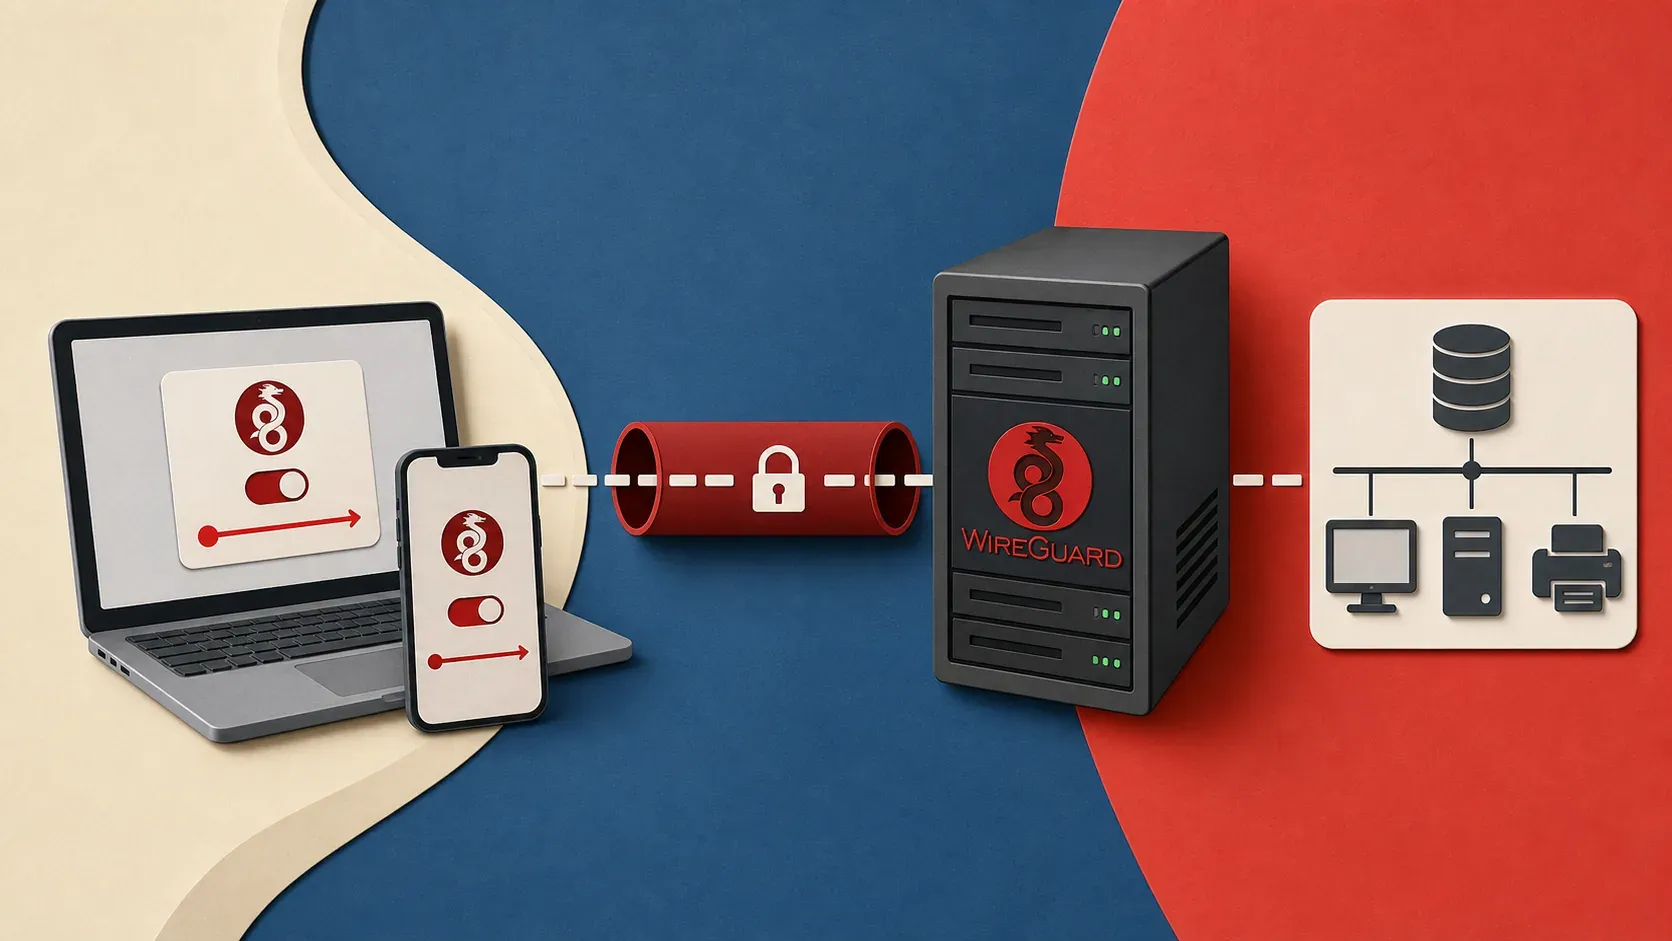
A WireGuard server is a small encrypted network interface, not an account system or web dashboard. Each device has its own key and tunnel IP; the server identifies it by public key and routes only the addresses assigned to that peer.
This guide builds a native server on Ubuntu 24.04. It is deliberately separate from the WireGuard Docker Compose guide: choose this path for the smallest dependency chain and direct host-network control. A self-hosted VPN hides traffic from local Wi-Fi or an ISP, but moves trust to the VPS provider and destination services. It does not make browsing anonymous.
WireGuard server configuration at a glance
| Component | Address | Purpose |
|---|---|---|
Ubuntu server wg0 |
10.66.66.1/24 |
VPN gateway |
| Laptop peer | 10.66.66.2/32 |
First client |
| Optional IPv6 tunnel | fd42:42:42::/64 |
Private IPv6 inside the tunnel |
| Public endpoint | vpn.example.com:51820/udp |
Client entry point |
The server file is /etc/wireguard/wg0.conf: one [Interface] section followed by one [Peer] section per device. AllowedIPs acts as both a routing selector and an incoming-source allowlist, so each client needs a unique /32 IPv4 address and, when used, a unique /128 IPv6 address.
Prerequisites
- An Ubuntu 24.04 or current Debian VPS with public IPv4.
- Root or
sudoaccess over SSH. - UDP 51820 allowed in the host and provider firewalls.
- A hardened base server. Complete the Linux VPS hardening checklist and SSH hardening guide first.
If you are choosing a host, use the VPS comparison. Find the public interface instead of guessing it:
ip route show default
The examples use ens3; replace it if your output differs.
Install WireGuard on Ubuntu
Current Linux kernels support WireGuard directly. Install its tools plus qrencode for mobile provisioning:
sudo apt update
sudo apt install --yes wireguard qrencode
wg --version
sudo install -d -m 0700 /etc/wireguard
The official installation page lists packages for other operating systems.
Generate server and client keys
Use a restrictive umask. Never put a private key in shell history, logs, screenshots, or the other peer's configuration.
umask 077
wg genkey | sudo tee /etc/wireguard/server.key \
  | wg pubkey | sudo tee /etc/wireguard/server.pub >/dev/null
sudo chmod 600 /etc/wireguard/server.key
sudo cat /etc/wireguard/server.pub
Generate the laptop keypair on the laptop when possible:
umask 077
wg genkey | tee laptop.key | wg pubkey > laptop.pub
Copy only laptop.pub to the server. Keeping the client private key on the client limits damage if the server is compromised.
Enable IPv4 and IPv6 forwarding
sudo tee /etc/sysctl.d/99-wireguard.conf >/dev/null <<'EOF'
net.ipv4.ip_forward=1
net.ipv6.conf.all.forwarding=1
EOF
sudo sysctl --system
sysctl net.ipv4.ip_forward net.ipv6.conf.all.forwarding
IPv6 forwarding does not automatically provide public IPv6 to clients. Clean routed IPv6 requires a provider-routed prefix. The ULA range below works privately inside the tunnel; do not add ::/0 on clients until routed IPv6 or deliberate NAT66 has been tested.
Create /etc/wireguard/wg0.conf
Open the file with sudo vim /etc/wireguard/wg0.conf and insert the real keys:
[Interface]
Address = 10.66.66.1/24, fd42:42:42::1/64
ListenPort = 51820
PrivateKey = <SERVER_PRIVATE_KEY>
PostUp = iptables -A FORWARD -i %i -j ACCEPT; iptables -A FORWARD -o %i -m conntrack --ctstate RELATED,ESTABLISHED -j ACCEPT; iptables -t nat -A POSTROUTING -s 10.66.66.0/24 -o ens3 -j MASQUERADE
PostDown = iptables -D FORWARD -i %i -j ACCEPT; iptables -D FORWARD -o %i -m conntrack --ctstate RELATED,ESTABLISHED -j ACCEPT; iptables -t nat -D POSTROUTING -s 10.66.66.0/24 -o ens3 -j MASQUERADE

[Peer]
# laptop
PublicKey = <LAPTOP_PUBLIC_KEY>
AllowedIPs = 10.66.66.2/32, fd42:42:42::2/128
Ubuntu 24.04's iptables command uses the nftables backend. Scoping MASQUERADE to the VPN subnet avoids matching unrelated host traffic. Prefer routed IPv6; add matching ip6tables NAT66 rules only when that tradeoff is intentional and the server uplink works.
Protect and validate the file:
sudo chmod 600 /etc/wireguard/wg0.conf
sudo wg-quick strip /etc/wireguard/wg0.conf >/dev/null
Open the firewall and start WireGuard
sudo ufw allow 51820/udp comment 'WireGuard'
sudo ufw status numbered
sudo systemctl enable --now wg-quick@wg0
sudo systemctl status wg-quick@wg0 --no-pager
sudo wg show
Add the same UDP rule to the VPS provider firewall. Do not open TCP: WireGuard uses UDP and stays silent to unauthenticated packets.
Create the laptop configuration
[Interface]
Address = 10.66.66.2/32, fd42:42:42::2/128
PrivateKey = <LAPTOP_PRIVATE_KEY>
DNS = 1.1.1.1

[Peer]
PublicKey = <SERVER_PUBLIC_KEY>
Endpoint = vpn.example.com:51820
AllowedIPs = 0.0.0.0/0
PersistentKeepalive = 25
The WireGuard quick start describes 25 seconds as a sensible keepalive interval for peers behind NAT; omit it when it is unnecessary. The configuration above is an IPv4 full tunnel. Add ::/0 only after server IPv6 is verified.
Install the official client and import the file. On Linux:
sudo install -m 600 wg0.conf /etc/wireguard/wg0.conf
sudo wg-quick up wg0
For a phone, generate a separate peer and display its configuration only in a trusted terminal:
qrencode -t ansiutf8 < phone.conf
The QR code contains the phone's private key. Never paste it into chat, forward it to monitoring, or display it during screen sharing.
Full tunnel versus split tunnel
The client AllowedIPs decides what enters WireGuard:
# IPv4 full tunnel
AllowedIPs = 0.0.0.0/0

# Full dual stack, only after IPv6 works
AllowedIPs = 0.0.0.0/0, ::/0

# Split tunnel for VPN and private application networks
AllowedIPs = 10.66.66.0/24, 10.20.0.0/16, fd42:42:42::/64
Split tunneling is usually right for private dashboards such as Nginx Proxy Manager, n8n, or Vaultwarden. A full tunnel also makes the VPS the internet exit.
Add or revoke peers without dropping the tunnel
Append another [Peer] block with a unique key and address, then reload:
sudo systemctl reload wg-quick@wg0
sudo wg show
Peer changes reload without tearing down the interface. Changes to Address, PostUp, or PostDown need a restart. To revoke a lost device, remove its peer block and reload immediately.
Back up /etc/wireguard as secret material. Encrypt every off-site copy; the encrypted backup guide covers that workflow.
Test the tunnel
# Client
ip address show wg0
ip route get 10.66.66.1
ping -c 3 10.66.66.1
curl -4 https://icanhazip.com

# Server
sudo wg show
For a full tunnel, the exit address should be the VPS IPv4. Also test DNS. For a split tunnel, confirm an unrelated public destination still uses the client's normal connection.
Troubleshooting
| Symptom | Check | Fix |
|---|---|---|
| No handshake | sudo wg show; sudo tcpdump -ni any udp port 51820 |
Correct endpoint/keys and allow UDP in both firewalls |
| Handshake, no internet | sysctl net.ipv4.ip_forward; sudo iptables -t nat -S |
Enable forwarding and correct ens3 in the NAT rule |
| Private LAN unreachable | Compare routes and both AllowedIPs lists |
Add the subnet and a return route or intentional NAT |
| Some sites hang | ping -M do -s 1360 1.1.1.1 |
Try MTU = 1380 on the client |
| Mobile stops after idling | Inspect the last handshake | Add PersistentKeepalive = 25 on that client |
| DNS fails but IPs work | resolvectl status |
Use a resolver reachable through the selected routes |
| IPv4 works, IPv6 fails | ip -6 route; test curl -6 |
Remove ::/0 until IPv6 routing is complete |
| Fails after reboot | systemctl is-enabled wg-quick@wg0 |
Enable and start the service |
The official Ubuntu troubleshooting checklist likewise starts with keys, AllowedIPs, routes, addresses, and forwarding.
Security checklist and next step
- Use one key per device and revoke lost devices.
- Keep keys and QR codes out of logs.
- Restrict and encrypt configuration backups.
- Expose only the UDP listener; no admin UI is required.
- Patch the host and review the Docker security guide before adding other workloads.
- Treat DNS and the VPS provider as separate trust decisions.
If you want a managed exit instead of server ownership, see the Proton VPN review. If you want repeatable peer generation and container rollback, continue with the WireGuard Docker Compose guide.

Comments
Sign in with GitHub to comment. Threads live in the byteguard-comments repo.